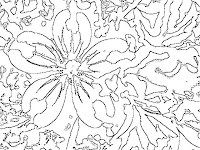
Two years ago I got Adobe Photoshop and it sat in my computer gathering dust as I just couldn't figure out how to work it. Yes, I went to the YouTube videos, website and even was too much of a dummy to figure out "Photoshop for Dummies." But recently I started going in and playing with only one or two features at a time and I think I'm finally getting the hang of it. I'm not going to be teaching a class or anything, but I can at least get a few things done. One thing I learned is how to take a photo and turn it into a colouring page. So that's what I'll be doing with my thousands of beautiful flower and mosques shots: turning them into colouring pages for my girls (once they have clean rooms).
Here are the steps so you can do it yourself:
1 - Make a copy of your photo and open the copy in Photoshop. Name it something else so you can tell the difference between the original and the copy. Flower1 and Flowercopy works well.
2 - Once in Photoshop, click on Layers and make a Duplicate Layer of your image.
3 - Check to see if your default ink colour is black if you want a black and white colouring page. Then go to Filter, click on Sketch and then Photocopy. Play around with the Detail and Darkness buttons until you get the effects you like. Once you like what you see, click on OK.
4 - This is when you can play around with your image before you save it. If you want to erase some lines, add some lines, resize, add text, etc. There are all kinds of buttons you can play with and discover on the left hand side (I have Photoshop Elements 7, you might have your buttons in a different location). When you're done, save your image as a JPEG file.
Ya'lla, you now have a colour page in four super easy steps. Put a few of them together and make a book, or print them out one at a time (double sided of course) to give to the kids.
Happy crafting!
.JPG)
+colouring+page.jpg)
No comments:
Post a Comment